
DocWizard turns a Word document into a reusable template, then fills it in with your data — one document at a time, or hundreds at once. This guide walks through the whole flow in the dashboard: create a template, connect your data, and generate documents.
A template is just a normal .docx file with merge fields written into it — plain
double-curly-brace placeholders anywhere in the text. For example, a simple invoice paragraph
might read:
Dear {{CustomerName}},

Thank you for your business. This invoice covers {{HOURS1}} hours of {{DESCRIPTION1}} at
a rate of {{RATE1}} per hour, for a total of {{AMOUNT1}}.
Each {{FieldName}} becomes a blank DocWizard fills in later. There's no special editor —
write it in Word (or any .docx-compatible editor) exactly like you'd write the document
normally, just with these placeholders where the variable content goes.
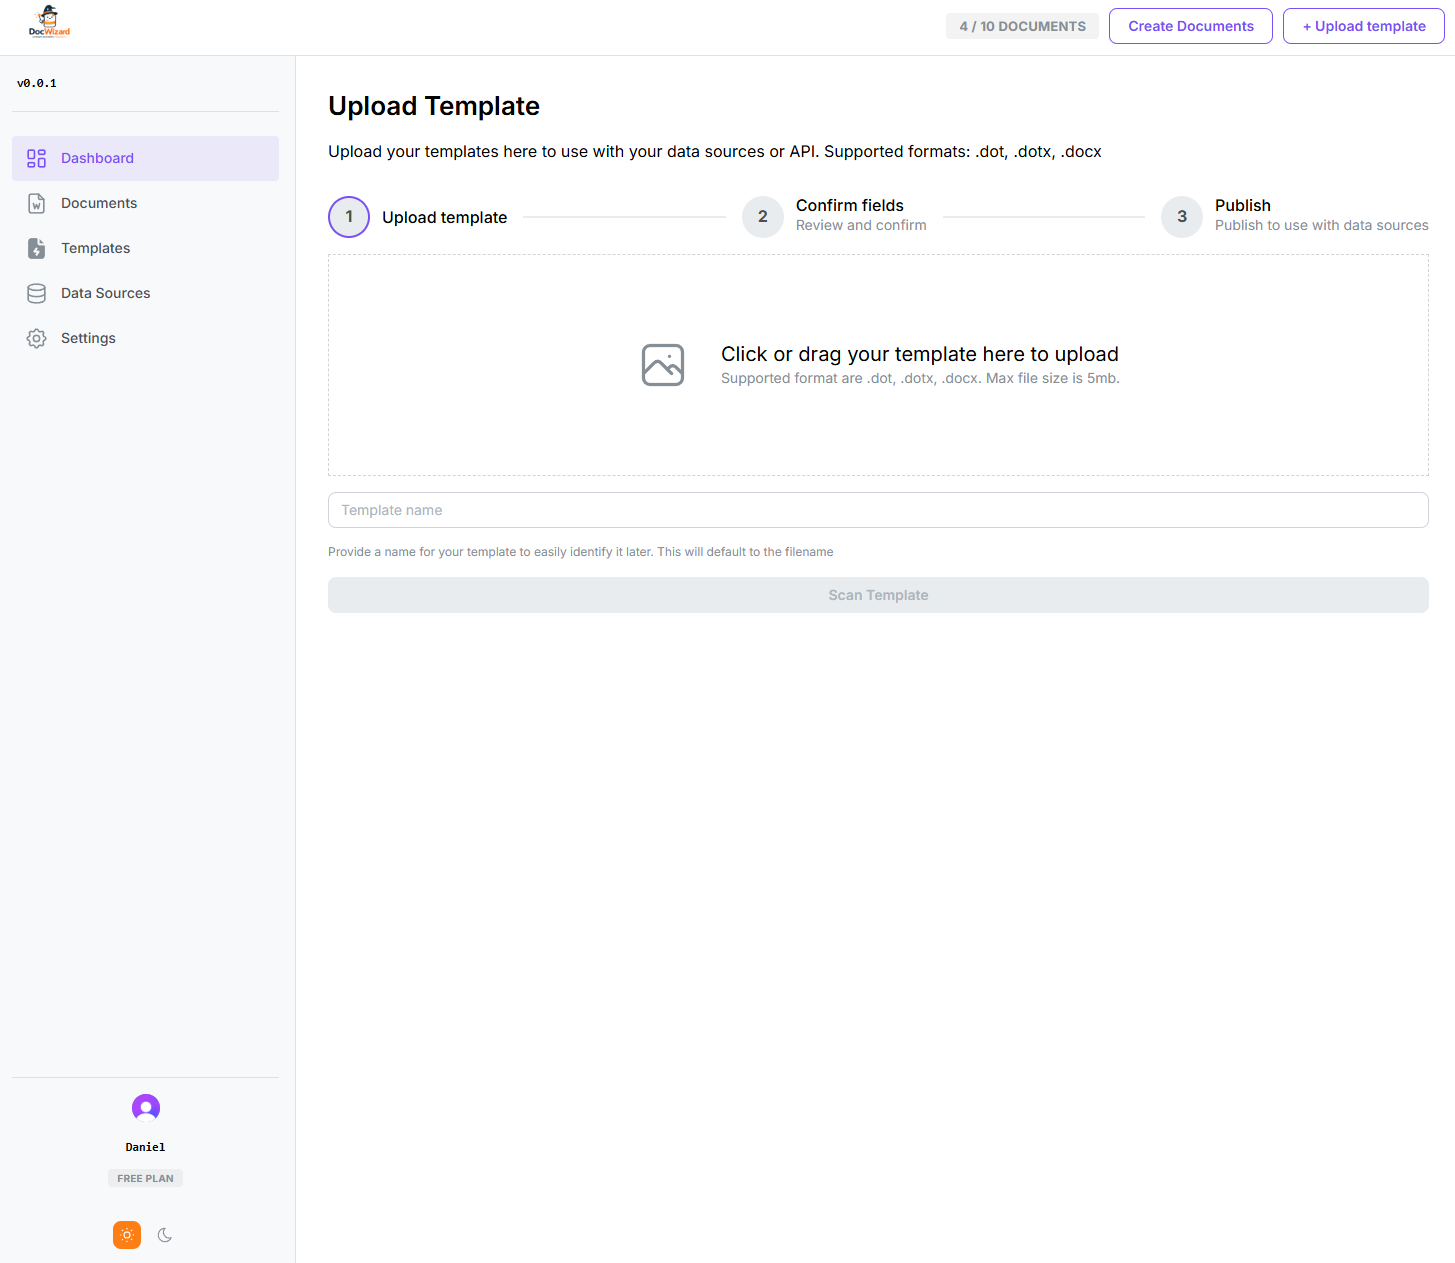
From Templates → Upload Template, drop your .docx file in, give it a name, and click
Scan Template. DocWizard reads the file and detects every merge field automatically —
you'll review the detected fields on the next step before publishing.
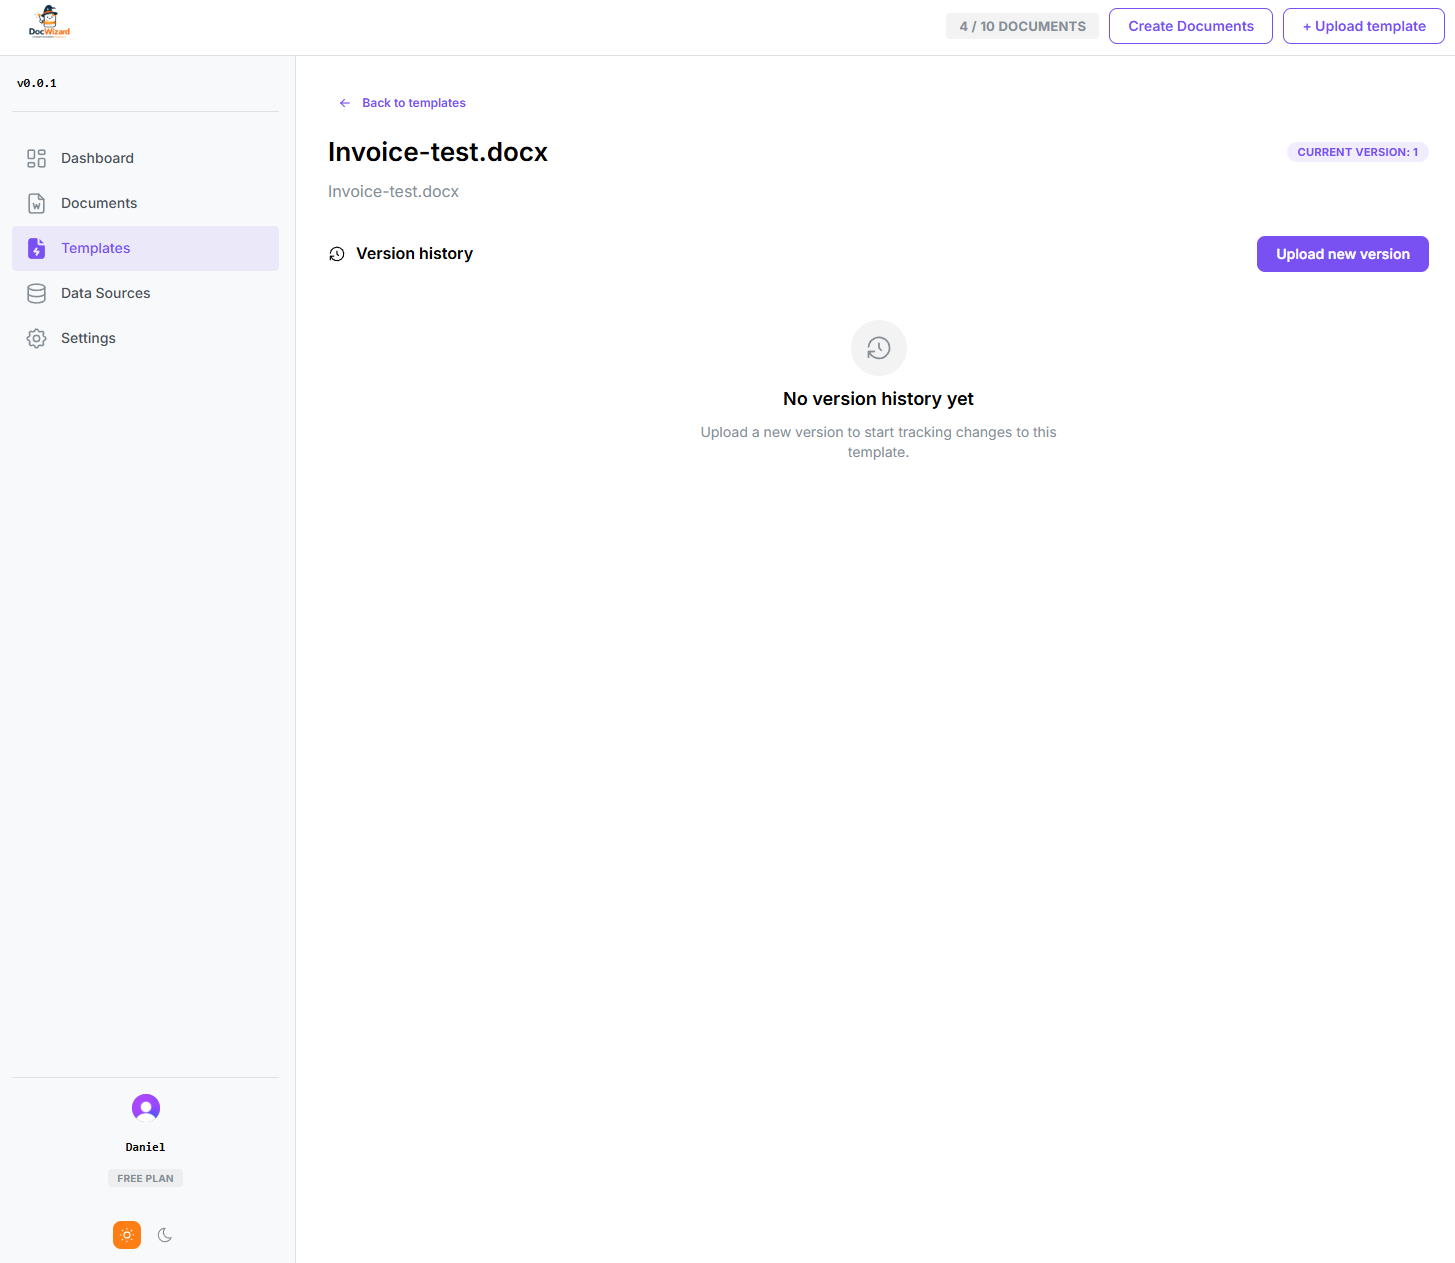
Once published, your template shows up in Templates, with its own detail page tracking version history — so if you need to tweak the wording later, you can upload a new version without breaking documents already generated from the old one.
Field names are NOT case-sensitive but must be uniqe.
{{CustomerName}}and{{customername}}are the same fields as far as DocWizard is concerned — fields must have a unique name otherwise they may get missed in the merge process.
DocWizard doesn't have a separate visual field-mapping step — mapping happens by naming:
whatever key you use for a piece of data must exactly match the {{FieldName}} in your
template. There are two ways to supply that data, depending on whether you're generating one
document or many.
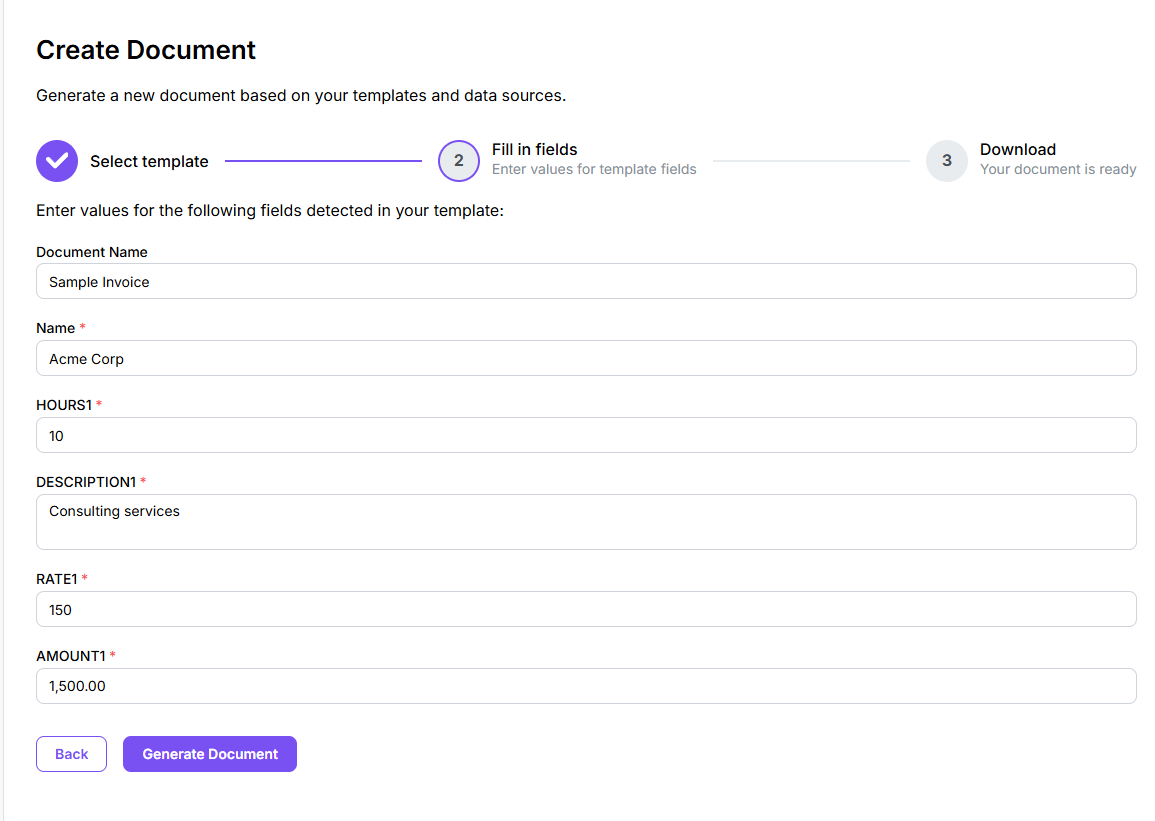
From Create Documents, pick a template and DocWizard shows you a form with one input per merge field it detected — this is the mapping step, just presented as a form instead of a spreadsheet-column matcher:
From Data Sources, pick a template and upload a .csv or .xlsx file — one row per
document you want generated. The trick is simple: your column headers must match the
template's field names. A file with columns Name, HOURS1, DESCRIPTION1, RATE1, AMOUNT1
maps straight onto a template using those same four field names — no separate mapping UI
needed, because the names are the mapping.
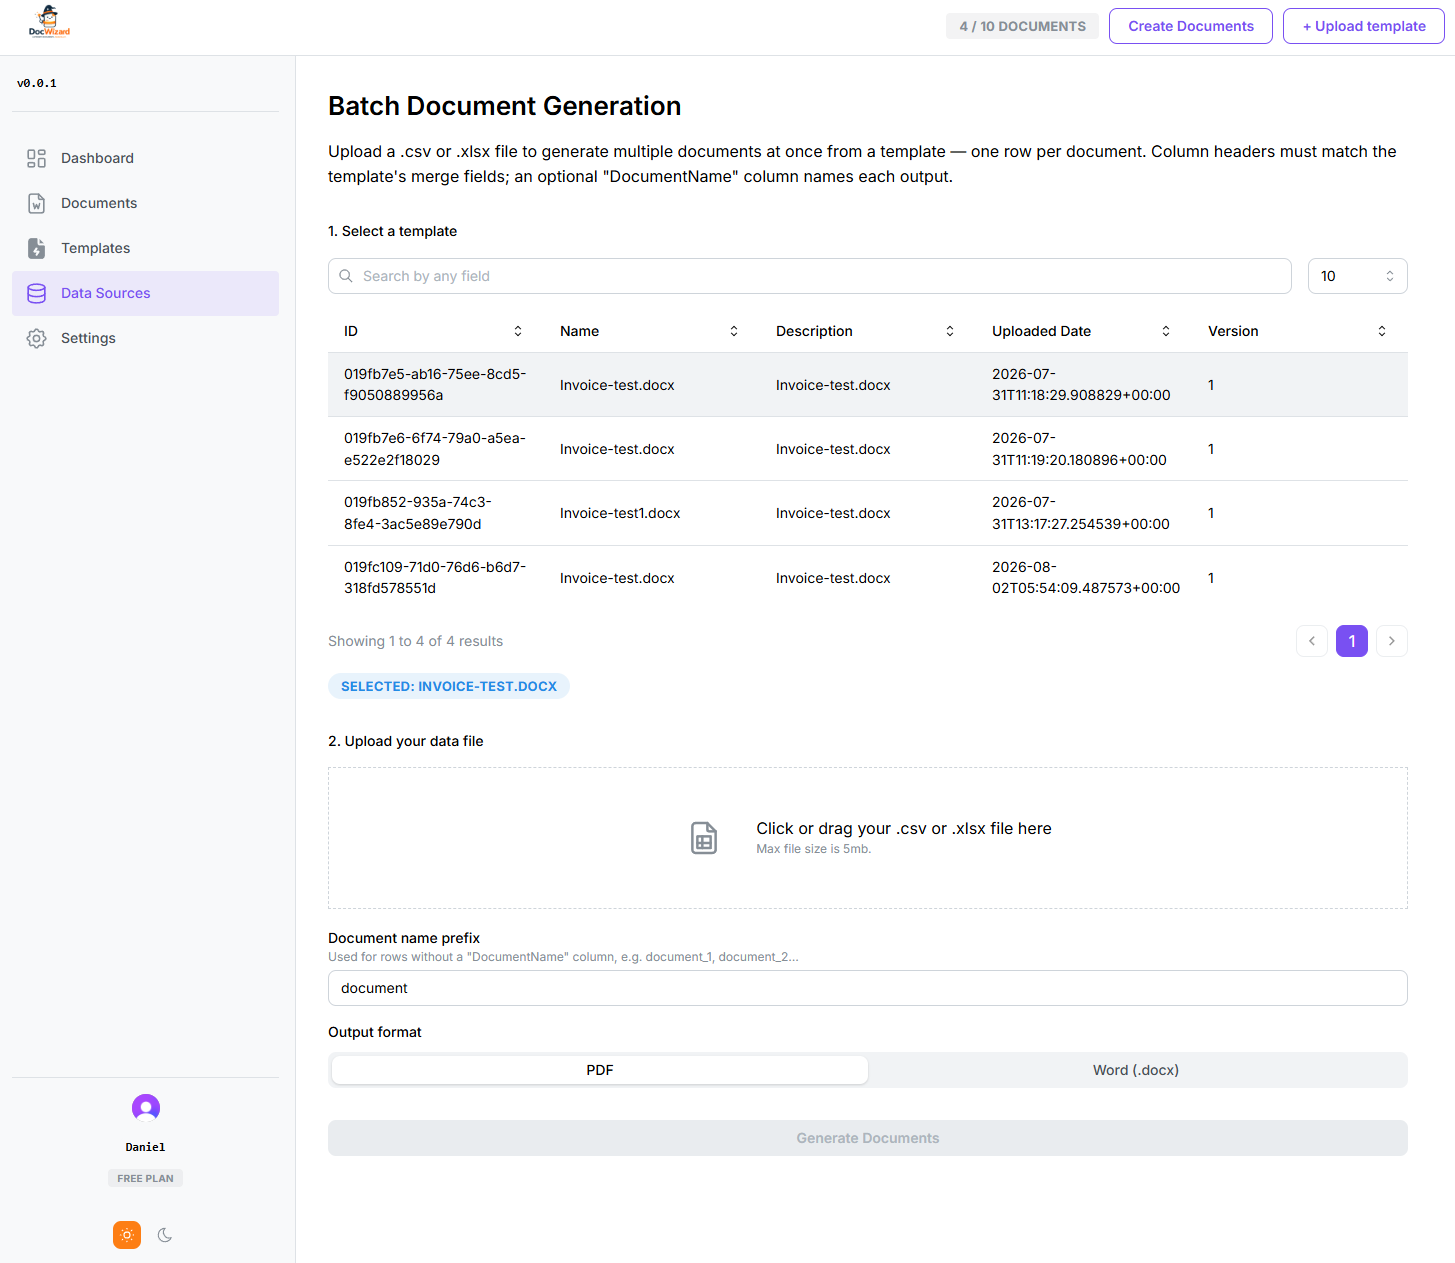
An optional DocumentName column lets you name each output individually; without it, rows are
named document_1, document_2, and so on.
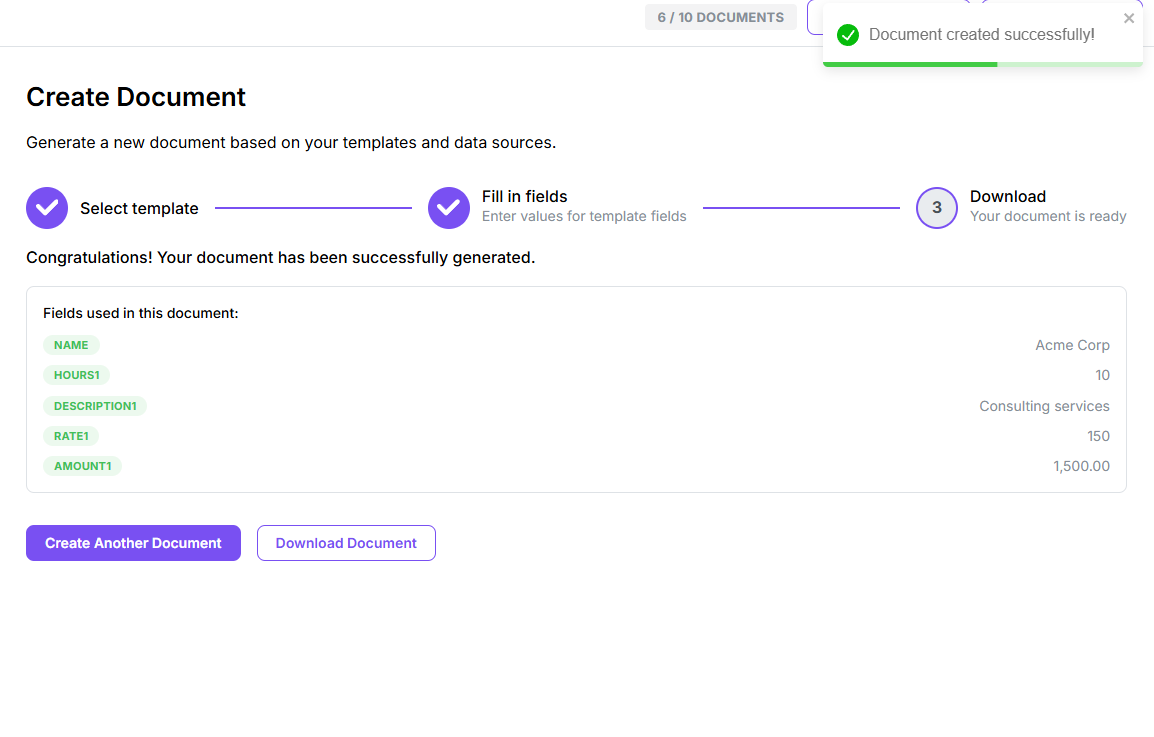
For a single document, filling in the form and clicking Generate Document produces the file immediately — the final step shows exactly which values went into it, and gives you a download link:
For a batch upload, clicking Generate Documents queues a background job (so a few hundred rows don't have to sit on one long request) — the page polls automatically and shows progress as it works through your rows, then gives you a single ZIP download once it's done.